Friday, 3 April 2015

Bacon & Tomato Breakfast Cake


Breakfast is my favourite meal of the day so the more excuses I have to eat breakfast foods morning, noon and night the happier I will be.

If you know you will be enjoying a night out on the town and these savory cakes can be made the day before and cooked when needed, making them the perfect lazy brunch for those of us that might be feeling slightly fragile the morning after.

Ingredients
  • 2 tablespoons oil
  • 200g (1 cup) bacon lardons (you can use bacon rashers, gamon or pancetta as an alternative)
  • 500g (2 cups) stiff mashed potatoes
  • 2 diced plum tomatoes, deseeded
  • 1 tablespoon chopped chives
  • flour for shaping
  • 30g butter
  • 1 or 2 eggs per person


Method

  • Heat 1/2 tablespoon of oil in a frying pan and fry the bacon until brown. Set aside and pat dry with kitchen paper.
  • Place the mashed potato into a large mixing bowl with the tomatoes chives and bacon, season to taste and mix well.
  • Lightly flour a work surface and shape to mixture into either 4 large or 6 medium sized cakes. Place on a floured tray and refrigerate for 15 minutes.
  • Heat the remaining oil in the frying pan and fry the cakes for 2 minutes on each side or until nicely crisp and browned and hot.
  • Serve topped with a poached egg (or fried) and a side of beans, maybe treat yourself to some gorgeous fresh bread as well to mop up that egg yolk.


Monday, 30 March 2015

Triple Chocolate Chip & Caramel Cookies


One of my favourite parts of my job is taking my bakes in for my colleagues to enjoy, and these cookies are guaranteed to satisfy, assuming that I haven't eaten them all by then! They are everything that you expect from a cookie and more, the crispy edge, gooey centre the flavor of white, milk and dark chocolate melting together in your mouth. So many times I find cookies can become boring quickly but with the pinch of salt cutting through the sweetness of the caramel and chocolate they keep me coming back for more.

If you're going to follow any advice from this recipe let it be this; REFRIGERATE YOUR COOKIE DOUGH FOR AT LEAST 1 HOUR BEFORE BAKING!!!!

The butter in your mixture needs to be super cold when in goes in the oven, the longer you leave it the better the texture and flavour will turn out.


Ingredients
  • 175g (1 cup) brown sugar
  • 165g (3/4) caster sugar
  • 150g (2/3 cup) unsalted butter
  • 2 teaspoons vanilla extract
  • 1 egg
  • 225g (1 1/2 cups) plain flour
  • 1/2 teaspoon salt
  • 1/2 teaspoon baking powder
  • 100g milk chocolate chips
  • 100g white chocolate chips
  • 100g dark chocolate chips
  • 1 packet of rolo chocolates cut in half
This really is as satisfying as it looks.


Method
  • Place the brown and caster sugar in a bowl with the butter and vanilla extract and beat for 8-10 minutes until the mixture is pale and fluffy. Add the egg and beat until well combined.. Add the flour salt and baking powder and mix to form a dough. Fold in the chocolate chips.
  • Roll 1 tablespoon of cookie dough into a ball and place on a lightly floured surface or greased baking tray and flatten down slightly whilst making a deeper indent in the centre for the rolo to be placed. Place 1 half of a rolo in the centre of each cookie, take another tablespoon of cookie dough and place on top forming a "lid" on each cookie. 
  • Place the cookies in the fridge to chill for a minimum of 1 hour, but overnight is ideal.
  • Preheat the oven to 160C (325F). Bake for 10-12 minutes, until the edges are golden. The cookies will still be soft in the centre so allow to cool on the tray before moving them.


Sunday, 29 March 2015

Mint Chocolate Ice Cream


My kitchen is full of gadgets that I never make the most out of. I've had an ice cream machine for at least 15 years and I must have used it about 4 times in those years. I've made a rather belated New Years Resolution to rediscover those less used kitchen gadgets.

This recipe is by The Icecreamists, creators of the infamous breast milk ice cream and will make 500ml of ice cream, and don't worry, this recipe uses milk of the cow variety.


Ingredients

  • 250ml (1 cup) full fat milk
  • 125ml (1/2 cup) double cream
  • 2 egg yolks
  • 88g (1/3 cup) caster sugar
  • 150g (2/3 cup) dark chocolate fondant mints e.g After Eights


Method

  • Pour the milk and cream into a large saucepan and heat gently, stirring occasionally, until the mixture begins to steam.
  • Meanwhile, whisk the egg yolks in a heatproof bowl and add the sugar until the mixture is pale and slightly fluffy. Slowly pour the hot milk into the egg mixture, whisk continuously to prevent the eggs from scrambling. Return the mixture to the saucepan and stir frequently over a low heat until the mixture thickens and coats the back of a wooden spoon.
  • Pour the mixture back into the bowl and set aside to cook to room temperature. This will take about 30 minutes, or to speed up the process place the bowl in a sink half filled with cold water and ice. Never place the hot mixture in the fridge.
  • Whilst the mixture is cooling melt 120g (1/2 cup) of the chocolate mints in a heatproof bowl over a pan of simmering water.
  • Once the ice cream mixture is cooled add the melted chocolate mints and blend with a stick blender. Refrigerate until the mixture is 4C (39F), this will take a minimum of 6 hours.
  • Pour the mixture into an ice cream machine and churn according to the manufacturer's instructions.


TIP If you don't have an ice cream machine place the mixture in a freezer proof container, cover with a lid and place in the freezer for 50 minutes. Remove from the freezer and whisk to remove any ice crystals, place back into the freezer for 2-3 hours, removing it every 30 minutes to whisk. Finally leave until completely frozen.

  • When the churning is complete roughly chop the remaining chocolate mints and fold them into the ice cream.
  • Place the ice cream into a freezer proof container and freeze until it reaches the desired consistency.


Saturday, 28 March 2015

Strawberry & Passionfruit Pavlova


Spring is definitely on it's way and there is no better way to welcome in the warmer weather than with this pavlova. (I hope I'm not speaking too soon regarding the weather).

Meringues can take a long time to cook and need even longer to cool so make sure you leave enough time to make this. I made the mistake of making my meringue on a Sunday afternoon when I needed the oven immediately after to make my Sunday roast. This meant that my meringue cooled to quickly, causing it to crack.
You can make the meringue the day before and store it overnight in an airtight container and top it with the cream and fruit on the day of use.

This recipe has been adapted from Donna Hay's "Classic Pavlova".

Ingredients
  • 150ml egg white (approx 4 egg whites)
  • 220g (1 cup) caster sugar
  • 250ml (1 cup) double cream
  • 1 teaspoon vanilla extract
  • pulp from 2 passion fruits 
  • 200g strawberries
  • optional: food colouring paste
Method
  • Preheat the oven to 150C (300F). Place the egg whites in an electric mixer of a large bowl and whisk the egg whites until the form stiff peaks. Add the sugar gradually 1 tablespoon at a time. Wait at least 10 seconds in-between each spoonful. Once all of the sugar is added continue to whisk until the meringue mix is smooth and glossy.
TIP To check that the meringue is thoroughly whisked, rub a small amount in-between your thumb and forefinger, it shouuld feel smooth to the touch. If you can feel small grains of sugar in the meringue continue whisking.
  • Spoon the meringue onto a lined baking tray so that it form an 18cm (7 inch) circle. Turn the oven temperature down to 120C (250F) and bake for 1 hour 30 minutes (DO NOT OPEN THE OVEN DOOR FOR THE FIRST 45MINUTES OF COOKING!)
  • After the allotted cooking time switch off the oven and leave the meringue to cool completely inside the oven. 
TIP  If your meringue cools too quickly this is when cracks will form (like mine). 


  • Once the meringue has cooled place the cream and vanilla extract in a bowl and whisk, until it forms soft peaks. At this point you can use a pallete knife or the handle end of a spoon to cut a tiny amount of food colouring paste through the cream forming a ripple effect.
  • Place the cream ontop of the meringue along with the strawberries and passionfruit.
  • Devour immediately.


Tuesday, 24 March 2015

Maple & Cinnamon Granola


Since coming back from America I've been trying, and failing, to get on the healthy eating band wagon. There's something about those sweet, sugary, subtly spicy flavours that is just so addictive. This recipe definitely satisfies those sugary cravings and because it is packed full of oats, nuts and seeds leaves me feeling full after only a small bowl. 

The beauty of this recipe is that if you don't like a particular ingredient you can substitute it for an alternative or leave it out completely.


Ingredients
  • 125ml (1/2 cup) maple syrup
  • 2 tablespoons honey
  • 1 tablespoon vegetable oil
  • 1 teaspoon vanilla extract 
  • 2 teaspoons cinnamon
  • 1 teaspoon ginger
  • 300g (1 1/4cups) oats
  • 100g (1/3 cup) flaked almonds
  • 50g (1/4 cup) pumpkin seeds
  • 4 tablespoons sesame seeds
  • 100g( 1/3 cup) sultanas
Method
  • Preheat the oven to 150C 300F and line a baking tray with parchment.
  • Mix the syrup, honey, oil and vanilla extract in a large bowl with the cinnamon and ginger. Add he oats, almonds, and pumpkin and sesame seeds and mix until well combined. Pour onto the baking tray and bake for 15 minutes
  • Remove from the oven and mix in the sultanas. Place back in oven for another 15 minutes.
  • When the mixture is golden brown remove from the oven and leave to cool (it will become crisp and crunchy once cooled).
  • Store in an airtight container.


One of my favourite things about granola is, like your ability to play around with the ingredients, I enjoy eating it in so many different ways. On it's own with milk, with Greek yogurt and fruit compote or just grab a handful and shove it in! 

I eat it for any given meal of the day, and sometimes in-between, and I don't even like sultanas, but after 15 minutes in the oven they become even more sweet and so deliciously chewy I can't resist. It will keep for over 2 weeks in an air tight container, but I can't guarantee that it will last that long.


Sunday, 22 March 2015

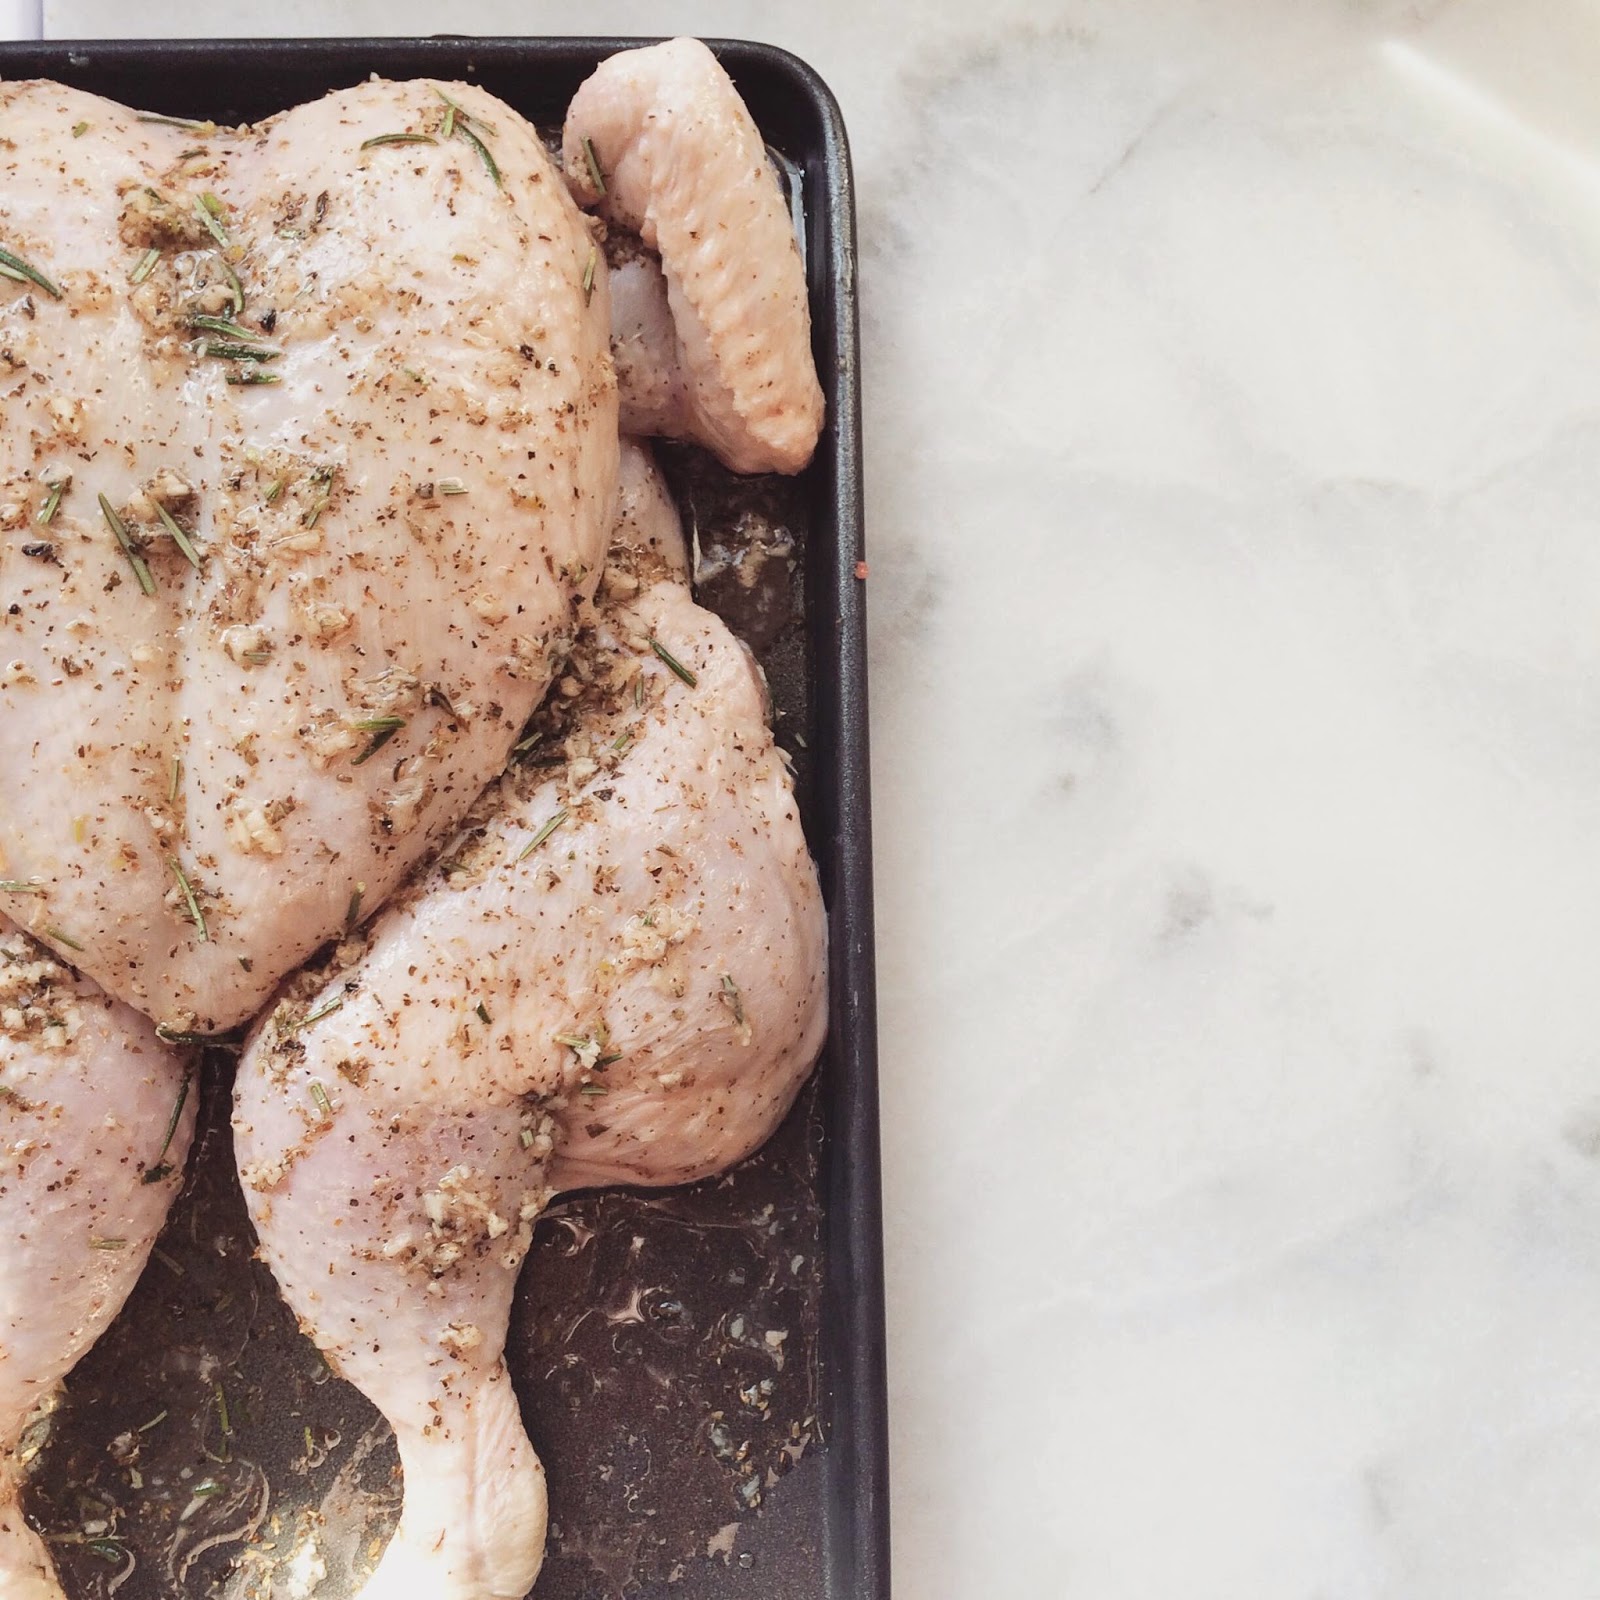
Summer Spatchcock Chicken

The sun has started breaking through and slightly warmer weather leaves me wanting an alternative to a traditional British Sunday lunch.

I finally decided to try spatchcocking a chicken after years of fearing that I might muck it up, and vegetarians beware, whilst the process is simple it is one of the more gruesome food preps there is.


Ingredients


  • 1 whole chicken
  • 60ml (1/4 cup) red wine vinegar
  • 60ml (1/4 cup) olive oil
  • 3 cloves of garlic, crushed
  • 1 teaspoon dried oregano
  • 1 sprig of fresh rosemary
  • salt and pepper


Method

  • Begin by spatchcocking the chicken. Remove the chicken from the packaging and remove any strings that may be holding the legs together. Turn the chicken over so that it is breast side down and it's legs are facing towards you. Using sharp scissors cut closely along either side of the backbone and remove.
  • Flip the chicken over so that it is now breast side up and press down firmly, flattening the chicken.
  • Place the vinegar, olive oil, garlic, oregano and rosemary into a bowl and mix until well combined.
  • With the chicken in a roasting pan cover with the mixure, and rub in ensuring that the chicken is well coated. 
  • Leave the chicken to marinadefor 1-2 hours. Preheat the oven to 200C (400F). Place the chicken in the hot oven and roast allowing 20-25 minutes per 500g. Spoon the juices over the chicken every 20-30 minutes.

    e.g. a 2 kilo chicken will need 1hour 20 minutes - 1hour 40 minutes
  • Make sure the chicken is cooked through before serving.


With some salad and new potatoes, I think this will be a firm favourite meal.


Monday, 16 March 2015

Beetroot & Horseradish Soup

We all know that soups are a healthy and filling meal, but can so often taste and look pretty boring. Not only is this soup the prettiest you will ever lay your eyes on, it is by far the tastiest soup you will ever try (and I say this as someone who didn't like beetroot for 25 years).


Ingredients

  • 1 white onion
  • 1 small potato
  • 2 large parsnips
  • 1 litre of vegetable stock (I like to use Swiss vegetable Bullion powder)
  • 3 large beetroot diced
  • 7 tablespoons of sour cream
  • a pinch of ground ginger 
  • 2 tablespoons of horseradish cream
  • seasoning to taste
  • rocket (arugula) leaves for garnishing


Method


  • Heat the onion over a medium heat in a large saucepan until softened.
  • Add the potato and parsnips and cover with the vegetable stock. Bring to the boil and simmer for 15 minutes or until the vegetables are soft.
  • Place the beetroot in the pan and blitz the mixture until smooth (I like to precook the beetroot as it helps give the soup a bright vivid pink colour). Because of the structure of beetroot don't expect the soup to be as smooth as other vegetable soups.
  • Add the sour cream, ginger and horseradish and mix until incorporated. 
  • Season to taste and serve hot, topped with a small rocket nest.


Perfection.


Sunday, 19 January 2014

Croissants

I decided to set myself a bit of a challenge  this weekend and decided to tackle croissants.  I realised during the process that this Viennoiserie pastry isn't as difficult to make as I thought it was going to be, but if you are going to make your own croissants please note that they are extremely time consuming and you will need to start making these the day before you want to eat them.


This recipe makes 12 croissants and comes courtesy of Paul Hollywood and his fantastic 'How to Bake' book. The recipe looks long and intimidating, but trust me, it is a lot easier than it first appears.

Ingredients
500g strong white bread flour, plus extra for dusting
10g salt
80g caster sugar
10g instant yeast
300ml cool water
300g chilled butter
1 egg beaten for glaze

Method
  • Put the flour into a bowl of a mixer fitted with a dough hook. Add the salt and sugar to one side of the bowl and the yeast to the other. Add the water and mix on a slow speed for 2 minutes, then on a medium speed for 6 minutes.
  • Tip the dough out onto a lightly floured surface and shape it into a ball. Dust with flour, wrap lightly with cling film and chill in the fridge for an hour.
  • Whilst the dough is chilling measure out the butter and place it into the freezer, this will make it hard and make rolling it out much easier.
  • On a lightly floured surface, roll the dough out into a rectangle, about 60 x 20cm. Place the butter in between 2 sheets of cling film and flatten into a rectangle, about 40 x 19cm. Put the butter on the dough so that it covers the bottom two-thirds of the dough. Make sure that it is positioned neatly and comes almost to the edges.
  • Fold the exposed dough at the top down over one-third of the butter. Now gently cut off the exposed bit of butter, without going through the dough, and put it on the top of the dough you have just folded down. Fold the bottom half of the dough up. You will now have a sandwich of two layers of butter and three of dough. Pinch the edges lightly to seal in the butter. Put the dough back in the cling film and chill in the fridge for an hour.
  • Unwrap the dough and put it on the lightly floured work surface with a short end towards you. Roll into a rectangle, about 60 x 20cm. This time fold up one-third of the dough and then fold the top third down on top to make a neat square to make a neat square. Put the dough back into the cling film and chill for another hour. Repeat this stage twice more, putting the dough back into the fridge for an hour each time.

  • Your dough now needs to be left in the fridge for 8 hours, or overnight, to rest. You will find that it will rise slightly in the fridge overnight.
  • When you are ready to shape the croissants, line 2 or 3 baking trays with baking parchment.
  • Place the dough on a lightly floured surface and roll out to a rectangle, a little more than 42cm long and 30cm wide. Trim the edges to neaten them.
  • Cut the rectangle down the centre into 2 strips, then cut triangles along the length of each strip; these should be 12cm wide at the base and about 15cm high (from the middle of the base to the tip).  You should get 6 triangles from each strip.
  • Before rolling, gently press down the wide base of the triangle and gently tug the opposite thin end to cause a slight tension in the dough. Now starting at the thick end of the triangle, roll up into a croissant.
  • Space the croissants out onto the lined baking trays, allow 4 – 6 per tray. Put each tray inside a clean plastic bag and leave the croissants to rise at cool room temperature until at least doubled in size. This should take about 2 hours.
  • Preheat your oven to 180C/160C fan/355F whilst the croissants are proving for the final time. Brush the croissants with the beaten egg glaze.
  • Bake in the centre of the oven for 15 – 20 minutes or until golden brown. Cool on a wire rack.
My one piece of advice would be to eat these whilst they are still warm. They will be gorgeously crunchy on the outside and light and fluffy in the middle with defined layers of pastry in between. Just try not to eat too many  at once!


Saturday, 18 January 2014

Pesto, black olive and sun-dried tomato bread plait

This bread tastes incredible still slightly warm out of the oven or completely cooled piled high with fresh ham and pickles. You can slice this bad boy or have it as a tear and share devour it all yourself.


Ingredients

  • 500g strong white bread flour, plus extra for dusting
  • 300ml lukewarm water (use 1 part boiled water to 2 parts cold)
  • 2 tbsp olive oil
  • 7g dried yeast
  • 1tsp salt
  • 4tsp pesto
  • 8 sun-dried tomatoes, finely chopped
  • 15 black olives, pitted and finely chopped
  • 1 egg beaten, for brushing


Method
  • Put the flour, water, olive oil yeast and salt  into a bowl, mix, turn out onto the kitchen surface and knead for 10 minutes. I use dried yeast which needs reactivating before being added, so take care to follow any further instructions on your yeast packet first.
To check if your dough is kneaded enough, pull out a piece of dough between your hands. It should be able to stretch to 20cm without breaking.
  • Place the dough in a slightly oiled bowl, cover with cling film or a damp tea towel and leave in a warm spot to prove for 1 hour. 
  • Whilst the dough is proving I like to blitz the tomatoes and olives, separately, in a food processor until they are finely chopped.
  • Divide into three equal parts (approx 262g each) and knead pesto into one, the sun-dried tomatoes into the second and chopped olives into the last.

  • Preheat the oven to180C/350F/Gas4
  • On a lightly floured surface roll each piece of flavoured dough into a long, even sausage. You may need some additional flour here if the dough is slightly wet.
  • Plait the strands of dough, pinching the ends together and folding them under to create a neat end. Brush the braid with a little beaten egg. Place on a baking tray and allow to rise for a further 30 minutes.
  • Bake the braid for around 35 minutes, the bread will sound hollow when tapped on the bottom.

Friday, 17 January 2014

Yorkshire Gingernut Biscuits

Being a Yorkshire lass, when my friends requested I make some ginger biscuits there was no other alternative than to make this classic recipe.  Gingernut biscuits are a deliciously crunchy and so quick and easy to make.


This recipe will make 40-50 biscuits.

Ingredients

  • 100g butter
  • 1 tbsp golden syrup
  • 350g self-raising flour
  • 100g demerara sugar
  • 100g light muscovado sugar
  • 1 tsp bicarbonate of soda
  • 1tbsp ground ginger
  • 1 large egg, beaten
  • 100g chocolate (optional)


Method

  • Preheat the oven to 160C/140C fan/Gas 3, and lightly grease 3 baking trays.
  • Measure the butter and golden syrup into a small pan ans gently heat together until the butter has melted. In a separate bowl mix the dry ingredients together and add in the butter mixture, followed by the egg (I like to do this by hand).
  • Form the dough into 40-50 balls, about the size of a walnut and place well apart of the prepared baking trays.

  • Bake for 15-20 minutes, or until golden brown. Remove the biscuits from the baking trays and cool on a wire rack. If you leave the biscuits to cool completely on the baking trays they may become stuck.

  • Once the biscuits have cooled completely you can melt 100g of chocolate and drizzle on top.


Tuesday, 14 January 2014

Blueberry porridge with cinnamon, honey and almonds

There are no two ways about it, I love porridge. It is low in fat, filling and the possibilities are endless when it comes to flavour combinations.


This recipe can easily be doubled up, and because all of the key ingredients are added at the end the whole family can enjoy a different breakfast without having to make a different meal for each person.
I like to add a pinch of cinnamon to the bowl when I make porridge; not only does it give my breakfast a nice warmth it can aid in metabolising and regulating sugar in the blood.

Ingredients

  • 38g porridge oats (I use rolled oats)
  • 250ml milk
  • Pinch of ground cinnamon
  • 1tsp honey
  • fruit and nuts of your choice
Method
  • Place the porridge oats in a saucepan with the milk and cinnamon. Stir over a medium heat for 2-3 minutes until the milk has been absorbed into the oats.
  • Transfer into a bowl and add whatever you want!
Of course adding extra fruit and nuts is going to give your breakfast a boost of flavour but it's also a great ways of adding extra protein and nutrients into your diet.

Instead of blueberries why not try adding apple slices, banana, strawberries or raspberries; and as a treat and an extra kick of sweetness i love a drizzle of golden or maple syrup.

What do you enjoy with your porridge? 

Sunday, 12 January 2014

Lemon Drizzle Cake with a Raspberry Glaze

I adapted this recipe from 2 recipes by Raymond Blanc and Mary Berry. The key to getting a lemon drizzle cake full of flavour is to add the topping whilst the cake is still slightly warm, this allows the lemon syrup to absorbed into the sponge and cools to leave a crisp sugar coating.

Traditionally lemon drizzle cakes are glazed with apricot jam, but I love the flavour combinations of lemon  and raspberry so I like to substitute raspberry jam as an alternative glaze. 


Ingredients

  • 225g butter
  • 225g caster sugar
  • 4 eggs
  • zest of 1 lemon
  • 225g self-raising flour


For the raspberry glaze
  • 2 heaped teaspoons of seedless raspberry jam
For the lemon drizzle
  • juice of 1 lemon
  • 85g caster sugar

Method
  • Begin by preheating the oven to 180C/fan 160C/gas 4 and lining a loaf tin (8cmx21cm) with baking parchment.

  • Beat the sugar and butter together until pale and creamy. Add the eggs one at a time, making sure each is well incorporated before adding the next.
  • Sift in the flour and finally mix in the grated lemon zest.
  • Pour the mixture into the lined loaf tin and place in the oven for 50-60 minutes, until a skewer inserted into the centre of the cake comes out clean.

  • Remove the cake from the oven, turn out onto a cooling rack and allow to cool for 10 minutes.
  • During this time prepare the drizzle by mixing together the lemon and sugar. In a separate bowl or saucepan warm the raspberry jam until it becomes runny. Spread the jam around the sides of the cake.

Pork and Beef Meatballs

This recipe makes enough for 10 servings. I like to make a large batch and freeze the portions that I don't eat. When you want a quick and easy dinner simply defrost in the fridge over night and heat through until the meatballs and sauce are piping hot.


When I need some real comfort food I forget the spaghetti and enjoy the meatballs served with some crispy fresh bread. 

Ingredients
  • 500g pork mince
  • 500g beef mince
  • 1 onion finely chopped
  • 1/2 bunch of parsley, finely chopped
  • 80g grated parmesan 
  • 2 eggs, beaten
  • 100g spaghetti per portion
For the Sauce
  • 3tbsp olive oil
  • 3 garlic cloves, crushed
  • 3x400g can of chopped tomatoes
  • 120ml red wine
  • 1 tbsp caster sugar
  • 1/2 bunch of parsley, finely chopped
Method

  • To make the meatballs mix together the pork, beef, onion, parsley and Parmesan in a large bowl. Add in the beaten eggs and season. Mix the ingredients together with your hands; the more you mash the mince the more tender the meatballs will be.


  • Roll the mixture into small meatballs (approx 1 dessert spoon). Set aside any meatballs for freezing then spread the rest out in a large frying pan, then fry for 20-30 mins until browned. You can either use 2 frying pans or fry the meatballs in batches.

  • Meanwhile, make the sauce. Heat the oil in your largest pan. Add the garlic and sizzle for 1 min. Stir in the tomatoes, wine, sugar, parsley and seasoning. Simmer for 15-20 mins until slightly thickened. Spoon out any portions for freezing, adding the cooked meatballs to the sauce to keep warm while you boil the spaghetti. Stir the meatballs together with the pasta and serve with some extra grated Parmesan and a few basil leaves.
N.B If you are freezing any portions it is really important that you allow the ingredients to cool at room temperature before placing in the freezer.

Saturday, 11 January 2014

Turkish Feta Meze Dip

I visited the most wonderful Anatolian Turkish restaurant in London over the Summer. It was one of those moments when everyone was so hungry we stopped at the first place we saw. The restaurant that we stumbled across was Tas.  We decided to order a few meze dishes, one of which was their "bademli peynir ezmesi", which means "almond butter cheese".


I reluctantly tried the dip, not being a fan of feta cheese, and I am so glad that I did, this has become one of my favourite foods. It is a simple dish to make and is packed full of flavour.

Ingredients
  • 400g feta cheese
  • 5 tbsp olive oil
  • 4 tbsp tomato paste
  • 3 garlic cloves, crushed 
  • 1/2 bunch of chopped parsley
  • 1/2 bunch of chopped coriander
  • 100g whole almonds, plus extra for serving

Method
  • Place the olive oil, tomato paste and garlic in a pan and stir over a low heat until the garlic has softened and the ingredients have incorporated.
  • Remove the tomato mixture from the heat, and set aside to cool. Crumble the feta into a large bowl and stir in the tomato, garlic, olive oil mixture along with the parsley coriander and almonds.
  • Transfer into a serving dish and scatter over the extra almonds, serve with warm toasted pittas.

Friday, 10 January 2014

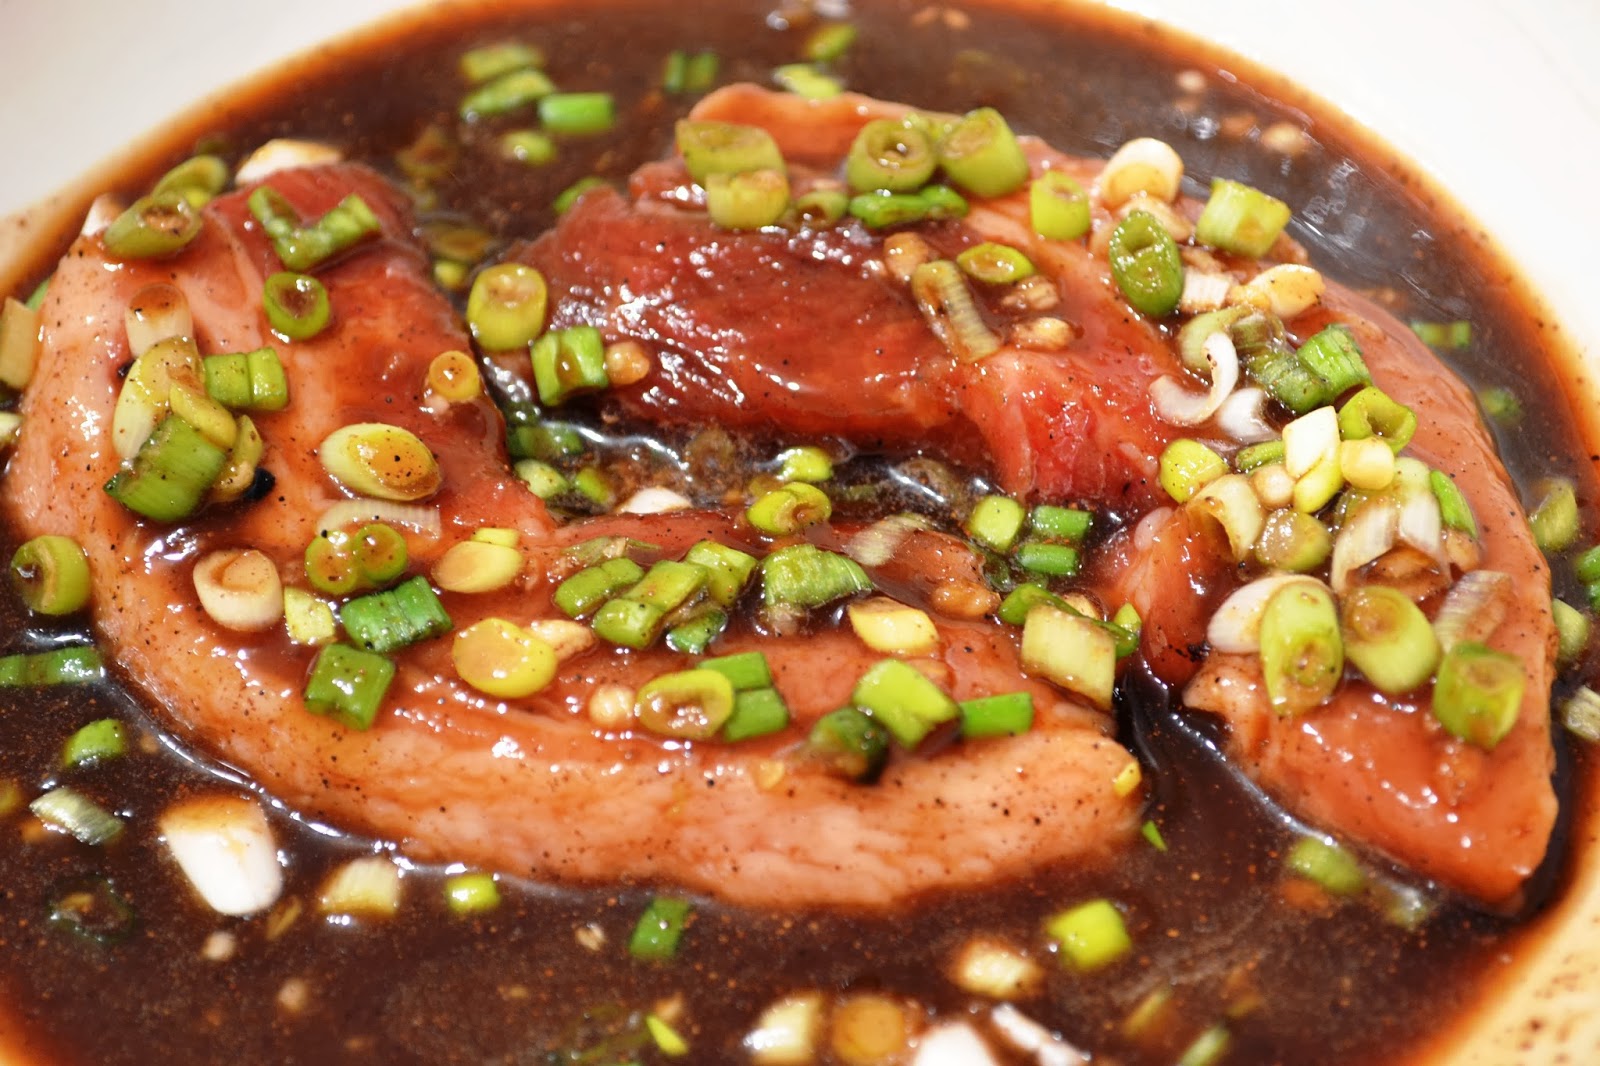
Pork Belly with Sticky BBQ Sauce


This recipe is wonderfully versatile, and can be enjoyed throughout the year. During the Summer I love to grill these on the BBQ, but they taste just as good baked in the oven. The recipe will make enough marinade for 8 strips of belly pork but can easily be doubled up if you want to make them for more people.

What I love most about this recipe is that the marinade doubles up as the sauce; also if you don't eat pork it goes beautifully with chicken.


Ingredients

  • 4 spring onions (scallions), sliced
  • 2 cloves of garlic, crushed
  • 3tbsp honey
  • 1tbsp soft dark brown sugar
  • 1tbsp Worcestershire sauce
  • 1tbsp soy sauce
  • 1/2 tbsp rum
  • 3 tsp Dijon mustard
  • 1/2 tsp ground allspice

Method

  • Tip the ribs into a big bowl and throw in the spring onions, and garlic. Now spoon all the remaining ingredients over the ribs and mix until well incorporated.
The pork can be cooked immediately or covered at this point and left to marinade in the fridge overnight.


  • Preheat the oven to 180C/160Cfan/Gas4 or heat the BBQ to a medium heat. If cooking in the oven transfer the pork to an oven proof dish with a little of the sauce. Cook for 20-30 minutes, turning and basting the meat every 5 minutes, until cooked through.
  • Place any leftover marinade into a saucepan and heat on a low/medium heat until thickened and sticky, pour over the meat just before serving.

Tuesday, 7 January 2014

Honey & Almond Madeleines

I know that it's the New Year and we should all be detoxing after a glutenous Christmas, but the weather has been so miserable recently that I still feel like I'm in hibernation mode.

These buttery French cakes are best enjoyed still warm from the oven with a cup of tea or coffee. The batter can be made in advance and baked in time for tea.


This was my first attempt at baking madeleines and I was incredibly happy with how they turned out. There was enough batter to make 20 madeleines, but this will vary slightly depending on your tin.

Ingredients
  • 3 large eggs
  • 80g caster sugar
  • 1 tbsp honey
  • 1/4 tsp vanilla extract
  • 80g plain flour, plus extra for dusting
  • 40g ground almonds
  • 75g butter, plus extra for greasing the tin


  • Preheat the oven to 190C/170C fan/gas 5
  • Generously butter, then flour, the madeleine or bun tins (if you are using a silicone madeleine tray you will not need to flour the tray as well).

     
  • Beat the eggs with the sugar, honey and vanilla extract until light and airy. 
  • Whisk in the flour and ground almonds until completely incorporated, then gradually whisk in the cooled, melted butter. 
  • Spoon the batter into the tins and bake for 10-12 mins, depending on the size of the tins.

  • When the madeleines are golden, risen and baked all the way through, remove from the oven and leave to cool for 2 mins before turning out.

Friday, 13 January 2012

Little Greene

It's the new year, so of course that means, with the arrival of spring, we all have another excuse to get the paint brushes out.
My favourite paint company, by far, has to be The Little Greene Paint Company. Their paints contain up to 40% more pigment which means a deeper, longer lasting result.
What I love most about this company is the extensive variation of colour that they offer. Their colour scale range is a soft palette of colours which offers subtle variations in hue. Making it extremely easy to co-ordinate woodwork with the walls.


I've included below a few of my favourite colours and pictures that they feature on their website.
Celestial Blue

James


Sage

Rolling Fog

French Grey
For further inspiration, they also have a their own flickr feed.

Ally
xxx

LinkWithin

Related Posts Plugin for WordPress, Blogger...